
With WordPress 5.0, WordPress is going to experience one of the biggest changes in a long, long time.
The new element? Aspic and span default content editorial manager, named Gutenberg.
The Gutenberg square editorial manager will totally supplant the formerly default TinyMCE supervisor that you’ve been utilizing for quite a long time. All things considered, the manner in which that you make content on your WordPress site is going to totally change.
To help make that progress as easy as could be expected under the circumstances, I’ve made this WordPress Gutenberg instructional exercise so you can be fully operational when you refresh your site to WordPress 5.0.
Differences Between WordPress Gutenberg and Old Editor
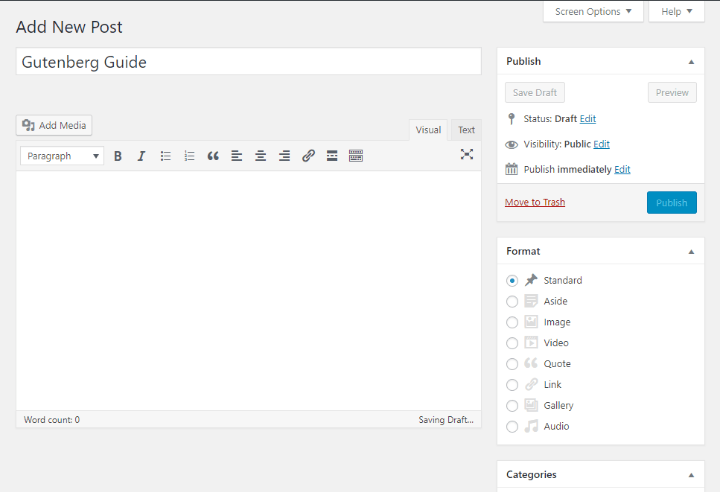
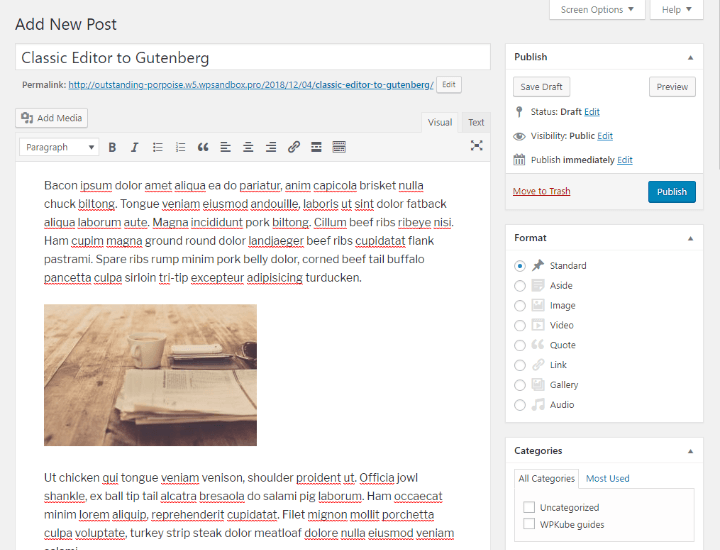
Alright, in the event that you’ve been a little befuddled about what I’m discussing, this is what the TinyMCE editorial manager appears as though (it ought to be truly recognizable to you!):
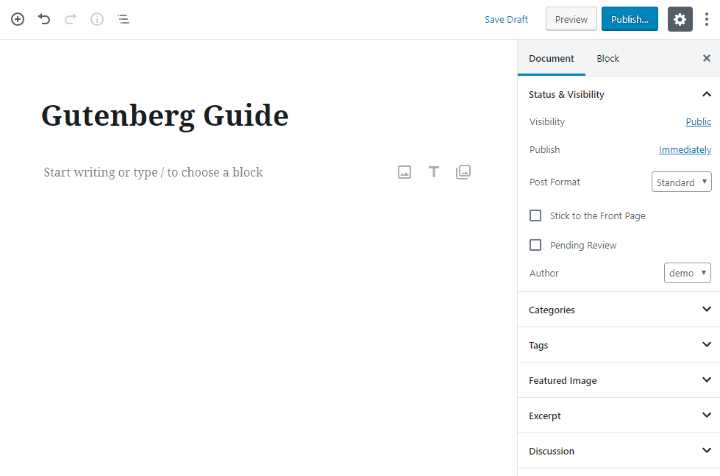
What’s more, this is what the new Gutenberg square proofreader resembles:
So… what’s the distinction?
Indeed, the huge one is that word – “square”.
As opposed to utilizing a solitary field for the majority of your substance like the TinyMCE supervisor, every “thing” in Gutenberg is a different square.
So:
- Each passage is a different square
- A picture is a different square
- A statement is a different square
- An implanted video is a different square
- … you get the thought! Everything that you may potentially utilize is its very own square
Next inquiry – for what reason are squares helpful? Why change how things were?
All things considered, the Gutenberg square editorial manager makes it significantly less demanding to make progressively entangled designs and utilize additionally fascinating substance types. Past that, it’s additionally much increasingly visual in light of the fact that you can see precisely how each square will look.
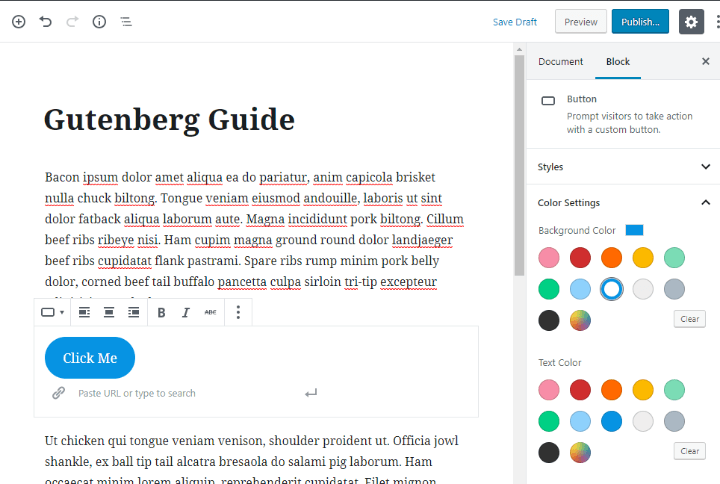
For instance, suppose that you need to add a catch to your post.
With the TinyMCE manager, you’d have to utilize the Text tab to include a CSS class or utilize a shortcode from a catch module. With Gutenberg, you simply include the Button block and you can see the catch in that spot in the editorial manager:
The other huge advantage of Gutenberg and squares manages the shortcodes that I referenced previously.
Shortcodes are not an extremely instinctive or visual approach to include content. With Gutenberg, module developers can make their very own squares as opposed to depending on shortcodes, which makes it a lot more straightforward to include module content.
WordPress Gutenberg Tutorial: Using The New Editor
Since you have some essential foundation on the new supervisor, we should get into the real “how-to” some portion of this guide.
I’ll break this Gutenberg proofreader instructional exercise into two sections.
In the first place, I’ll demonstrate to utilize Gutenberg to do similar sorts of things that you’re already ready to do with the TinyMCE editorial manager. The objective with this first segment is so you can continue making a similar sort of substance that you’re now making with no intrusion.
From that point forward, I’ll go somewhat more profound and show you propelled profitability tips, and in addition some of the new things that Gutenberg will give you a chance to do.
Step by step instructions to Create A Basic Blog Post Or Page With Gutenberg
Adding customary content to Gutenberg is basic. Much the same as previously, you snap and type. The main distinction is that each time you hit enter, Gutenberg will presently make another section square.
To arrange your content (strong, arrangement, and so on.), you’ll see a skimming toolbar that shows up once you quit composing:
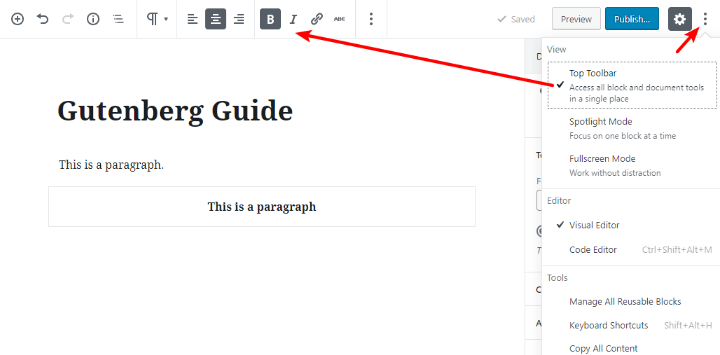
Numerous individuals don’t care for this “drifting toolbar” approach. So on the off chance that you incline toward the settled toolbar approach of the TinyMCE proofreader, you can utilize the drop-down in the upper right corner to “settle” the toolbar to the highest point of the editorial manager. Simply select the alternative for Top Toolbar:
Step by step instructions to Insert A New Block
When you’re simply thinking of, you can make new squares naturally by composing.
For everything else – pictures, recordings, headings, and so on – you’ll have to include another square.
There are two or three different ways to include new squares:
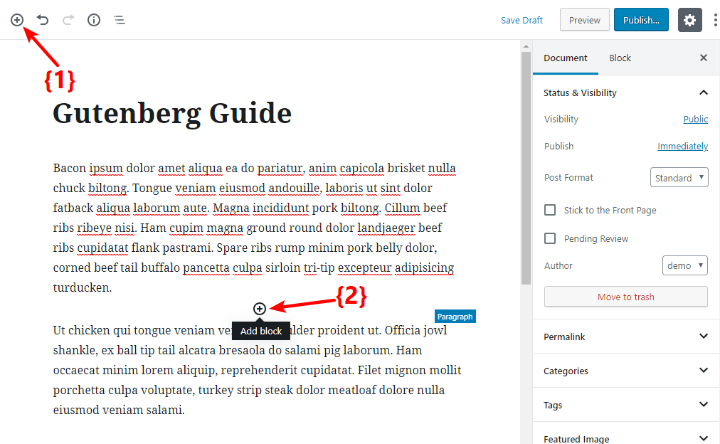
- To include another block at the base of the manager, you can tap the in addition to a symbol in the upper left corner of the proofreader.
- To include another block in between existing squares, you can float your mouse over the spot where you need to embed the square and tap the in addition to symbol there.
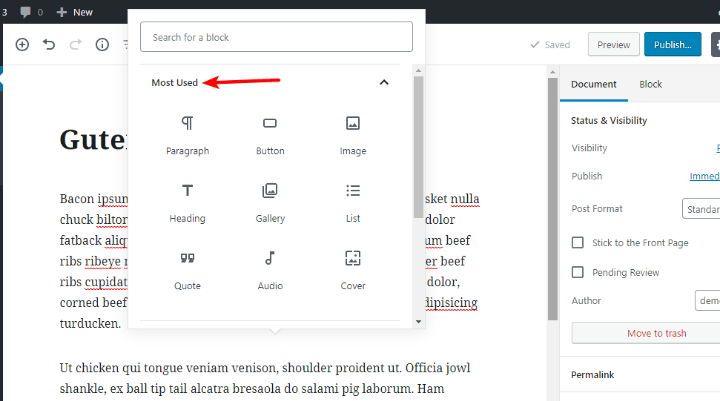
When you click both of the plus icons, a popup will create the impression that rundowns all the accessible squares.
At the highest point of the popup, you’ll get a rundown of the hinders that you utilize them frequently:
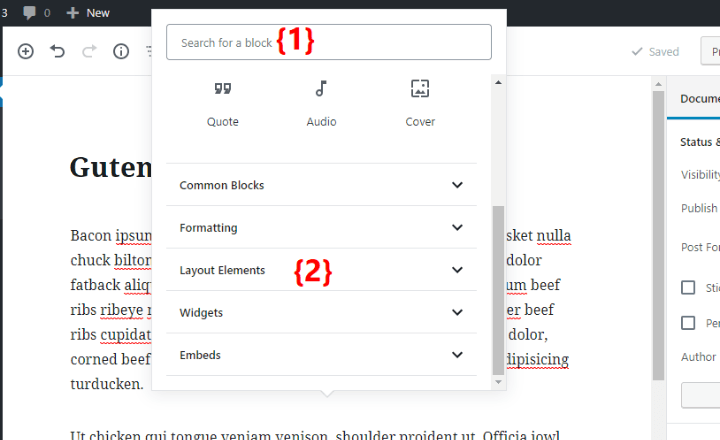
In any case, you can likewise:
Utilize the scan box to look for a square by name
Look down to see accordion tabs for every one of the classifications of accessible squares
How about we go through a couple of models…
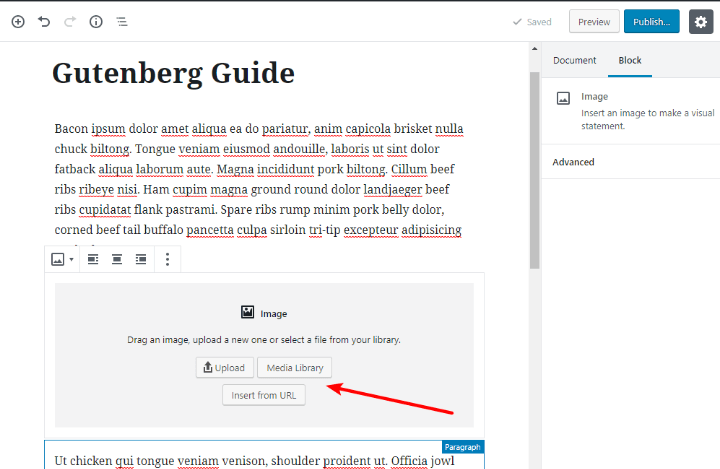
In the event that you need to embed a picture…
You would include the Image block. At that point, you can utilize the choices to pick where to get the picture from:
On the off chance that you need to install a YouTube video…
You would include the YouTube block. At that point, you simply glue in the URL to the video and you’ll see a live review:
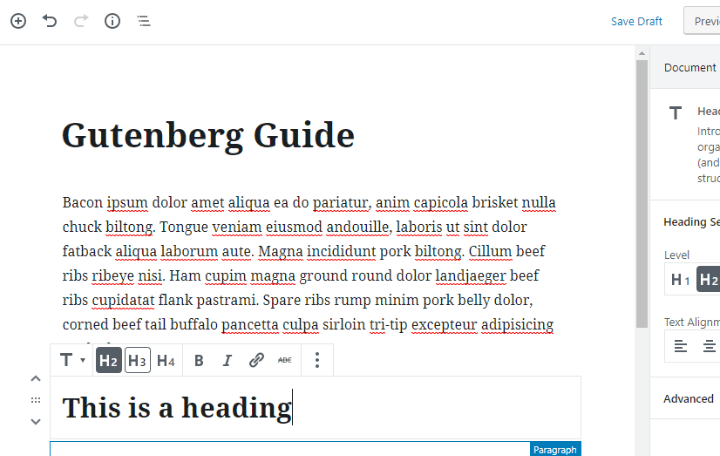
In the event that you need to embed a heading (h2, h3, and so on.)
You can include the Heading block and pick the heading level from the toolbar:
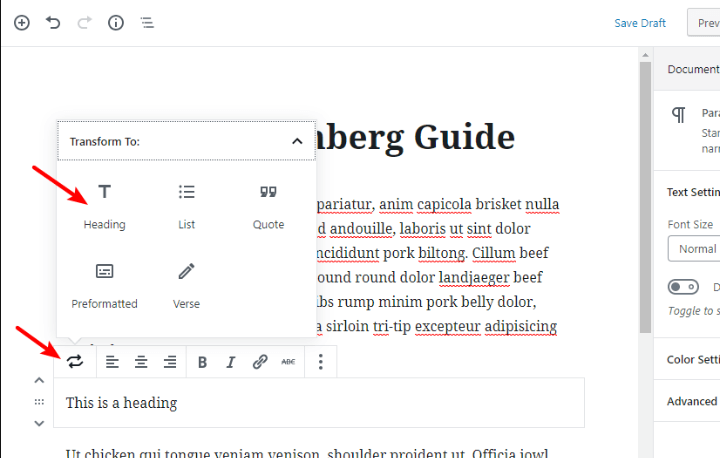
Or then again, you can likewise pick a current passage square and utilize the toolbar to “convert” it to a heading square (or another sort of square – like a statement):
The most effective method to Configure A Block
For essential things like intense, italics, arrangement, and so forth you’ll utilize the toolbar.
Be that as it may, for other square settings, you’ll use the Block tab of the sidebar on the right.
For instance, in the event that you include a Button block, you can utilize the sidebar on the privilege to change its hues:
The most effective method to Rearrange Content
In the TinyMCE editorial manager, you needed to utilize reorder in the event that you needed to modify content.
With Gutenberg, you get two choices:
- Up/down bolts that move a square up or down one spot
- Intuitive usefulness that gives you a chance to drag a square anyplace
To empower these controls, float over the square you need to move.
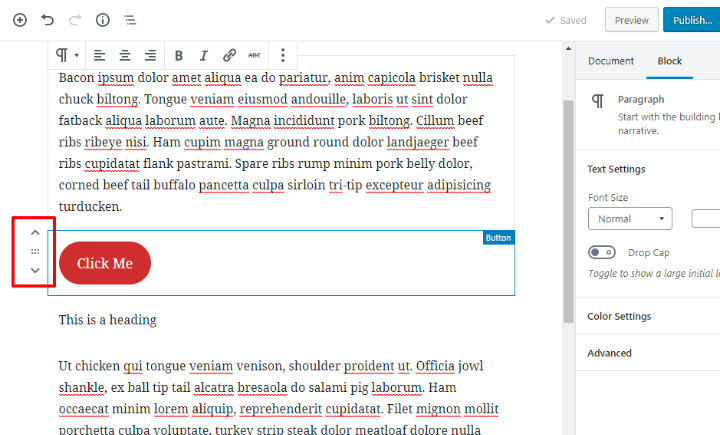
In the event that you need to utilize the intuitive usefulness, you have to float your mouse over the six dots in between the bolts. At that point, you’ll have the capacity to move this way:
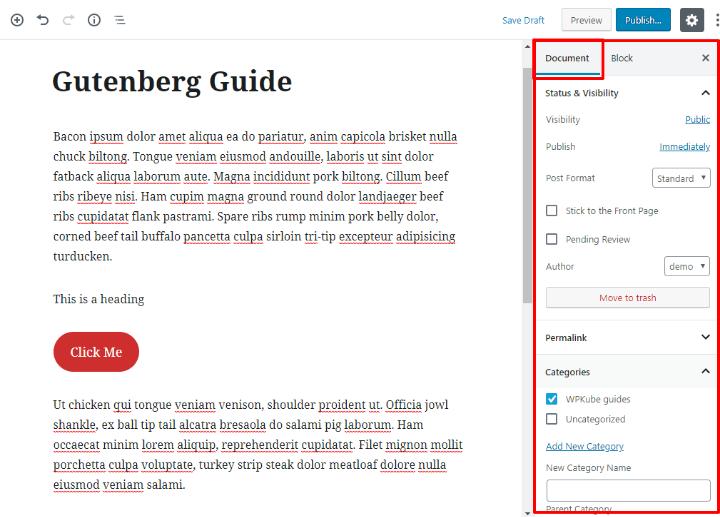
The most effective method to Configure Basic Post Information (Categories, Slug, Etc.)
The means above should give you everything that you have to make some essential posts and pages.
Be that as it may, shouldn’t something be said about them in the background data like:
- URL slug
- Categories
- Tags
- And so on.
To arrange the majority of this data, you can utilize the Document tab of the sidebar, which acts correspondingly to the sidebar in the TinyMCE editorial manager:
Shouldn’t something be said about Plugins Like Yoast SEO?
You presumably have different modules that you’ll have to design on a post-by-post premise. Basic precedents would be SEO modules, online networking modules, and so on.
So how do those function?
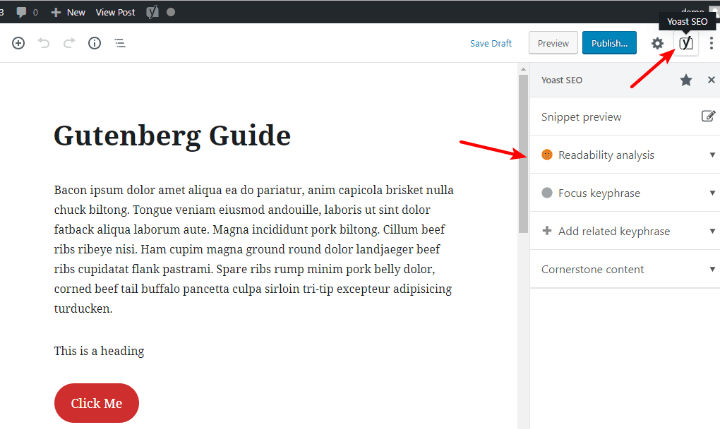
All things considered, some modules – like Yoast SEO – have effectively worked in Gutenberg bolster. To get to the Yoast SEO settings or different modules with such help, you can tap on the symbol in the upper right corner. At that point, you’ll have the capacity to arrange the module in the sidebar:
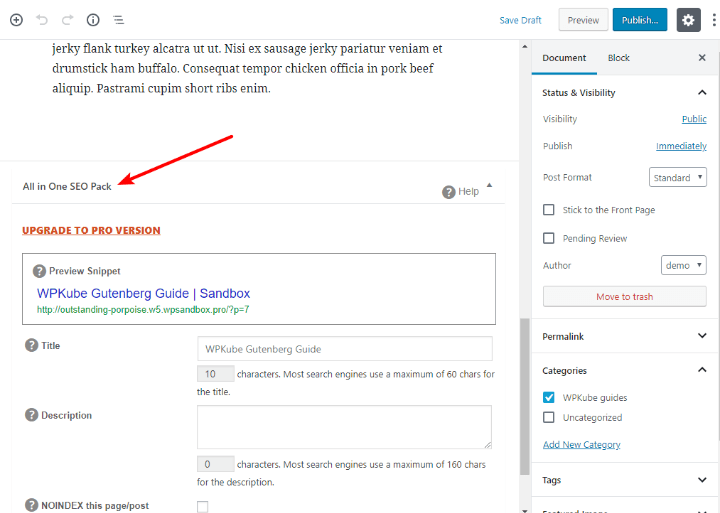
For different modules, regardless you’ll have the capacity to utilize “meta boxes” that show up underneath the content tool, much the same as previously:
Five More Advanced Tips For Using The Gutenberg Block Editor
The Gutenberg editorial manager instructional exercise above will enable you to continue making a similar sort of substance that you’ve just been working with the TinyMCE supervisor.
Presently, how about we cover some further developed tips for getting more from the Gutenberg supervisor.
1. Take in The Keyboard Shortcuts For Better Productivity
Since everything is a different square in Gutenberg, there are much more “mouse clicks” to complete things. That implies slower work, particularly toward the start.
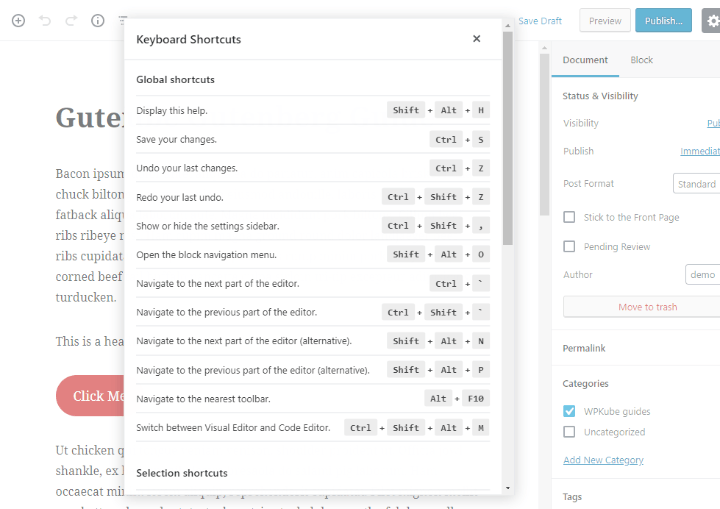
The most ideal approach to wiping out this issue is to take in the Gutenberg editorial manager console alternate ways. These will let you rapidly include or erase obstructs as required.
To open the full rundown of alternate ways, use the Shift + Alt + H shortcut:
2. Speedy Insert Blocks With Slash
Instead of utilizing the embed square popup each time you need to include a square, a faster strategy is to simply type “/” in a clear square and look for the square by name.
Here’s a model:
3. Drag Images From Your Desktop Into Gutenberg
To accelerate including pictures, you can drag them straight from your work area to an explicit spot in the supervisor. Gutenberg will consequently transfer them to your Media Library:
4. Utilize The Columns Block For More Complicated Layouts
On the off chance that you need to make progressively confounded formats, Gutenberg incorporates a Columns block. When you include the section square, you can add other blocks inside of it:
For greater adaptability with formats, you can introduce the Kadence Blocks module. Talking about…
5. Exploit Third-Party Blocks Plugins
An extraordinary aspect regarding Gutenberg is that you can utilize outsider modules to include new squares. Many developers are attempting to make new substance and design squares, which can help broaden Gutenberg’s usefulness. Some great ones to begin you off are:
The Gutenberg Cloud plugin is likewise an intriguing undertaking that gives you a chance to introduce explicit squares from an assortment of developers.
Past that, some modules that you as of now use will add squares to supplant shortcodes. For instance, on the off chance that you have a WooCommerce store, you’ll have the capacity to embed WooCommerce items in your substance utilizing another square.
The end result for Your Old Content After Updating To WordPress 5.0?
In the event that you as of now have a WordPress site, it’s normal to ponder what will happen to the majority of the substance that you’ve just made with the TinyMCE manager.
Try not to stress – the centre group kept in mind about your old substance.
Here’s the way it will work.
Suppose you have a post-manufactured utilizing the TinyMCE manager that resembles this:
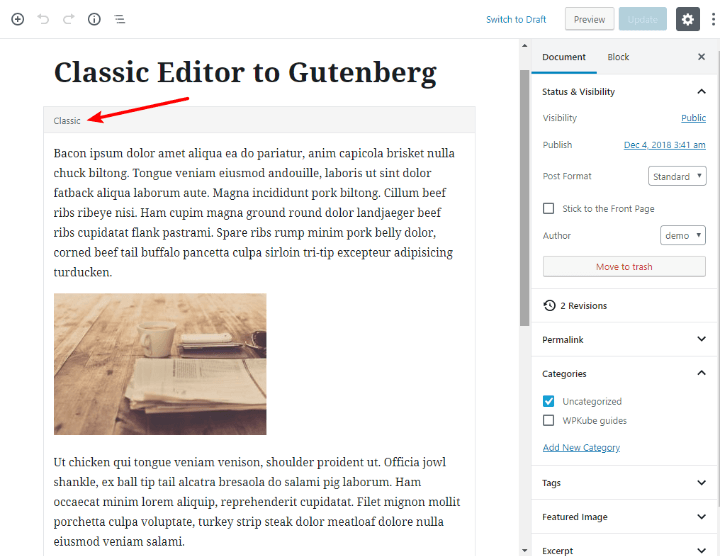
When you move to WordPress 5.0 and the Gutenberg square supervisor, WordPress will put the majority of the old substance into a single Classic block. The Classic square is essentially the TinyMCE manager… simply inside the Gutenberg interface.
So as opposed to every component being a different square, everything is simply in that one Classic square. It would seem that this:
On the off chance that you have to alter the substance, you can either alter it inside the Classic square simply like you would the TinyMCE editorial manager:

Or on the other hand, you can likewise pick the choice to Convert to Blocks. When you pick that choice, Gutenberg will break all your old substance into discrete squares and you’ll have the capacity to work with it simply like you’d fabricated the post sans preparation with Gutenberg.
Do You Have To Use The Gutenberg Editor? Would you be able to Keep Using The TinyMCE Editor?
You do not have to utilize the new Gutenberg square editorial manager. While it will end up being the default editorial manager in WordPress 5.0, there’s likewise an official Classic Editor plugin that will give you a chance to keep on utilizing the first TinyMCE supervisor that you’re as of now comfortable with. Moreover, the WordPress center group will keep on formally bolster the TinyMCE supervisor until at any rate the finish of 2021.
You should simply introduce the module from WordPress.org. When you actuate it, it will deactivate the Gutenberg square editorial manager and you’ll make content precisely equivalent to you did before WordPress 5.0.
Whenever wanted, the module likewise has another choice that lets you use both the TinyMCE manager and the Gutenberg square editorial manager and switch between them on a substance by-content premise.
To initiate this setting, go to Settings → Writing and pick the choice for Use the Block supervisor as a matter of course and incorporate discretionary connections back to the Classic manager:


With over two decades of web design and development expertise, I craft bespoke WordPress solutions at FallingBrick, delivering visually striking, high-performing websites optimised for user experience and SEO.